
Before Installation: Confirm Vent Type and Blade Condition
Vent phone holders are mainly secured by a clamp that hooks onto the vent blade. Before installation, observe the vehicle vent: whether the blades are horizontal or vertical, whether blade thickness and spacing are even, and whether any blade is loose or damaged. If blades are too thin or too soft, the clamp can slip easily; if blades are too thick, the clamp may not open fully. While observing, gently flick each blade with a finger to feel whether the rebound is consistent. If one blade is noticeably loose, that position is not suitable as a load-bearing point, and you should move to an adjacent blade or the vent on the other side.
Also confirm there is enough space around the vent for the phone and holder. On some models the vent is close to the center screen or steering wheel, and after installation it may block the view or buttons. It is advisable to test the position inside the car before deciding which vent to clip onto. During this test, mount the phone on the holder and put it back in place to simulate the real usage angle, focusing on whether the lower edge of the phone presses the center console buttons and whether the upper edge enters the wiper or instrument viewing area.
For buyers, it is advisable to collect vent data for common models in the target market at the sample stage and confirm whether the clamp opening range can cover them. The factory has 21 models already on tooling, and different clamp structures correspond to different blade thicknesses; when selecting, you can request the clamp opening dimensions. For example, if the target market is dominated by models with thin blades, prioritize a clamp structure with a smaller minimum opening, and record the blade thickness and clamping performance of that model in the sample report as a reference for subsequent orders.
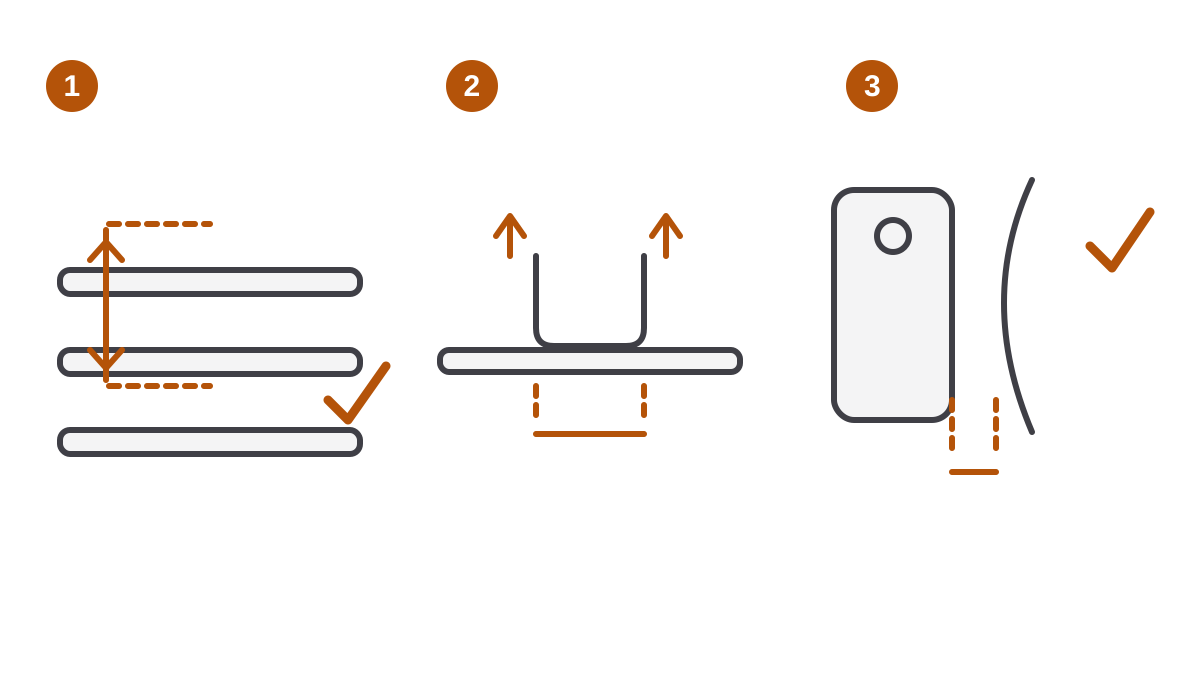
To compare clamp structures before choosing, continue with the vent mount buying guide. For a different in-car format, see the X23 car phone stand; X23 is not an air-vent clip.
Standard Installation Steps: From Clamp to Phone
The following steps apply to most clamp-type vent holders; refer to the product manual for specifics.
- Open the clamp: press the release button or turn the adjustment knob so the clamp opens wider than the blade thickness.
- Align with the blade: point the clamp opening at the vent blade and keep the holder perpendicular to the blade.
- Push in and lock: push the clamp onto the blade until you hear a click or tighten the knob, then pull the holder gently to confirm it is not loose.
- Adjust the angle: adjust tilt and left-right angle via the ball joint or hinge to avoid blocking the driver's view.
- Place the phone: put the phone into the clamp arms and confirm the arms grip firmly without pressing the side buttons.
- Check stability: gently shake the holder and phone by hand to confirm there is no wobble and no slipping.
Do not use excessive force during installation, to avoid breaking the blade or damaging the clamp. If the clamp is hard to push in, first check whether the opening is fully open; do not press it in by force. Take a real owner's scenario as an example: he first opened the clamp to its maximum, then pushed it vertically onto a horizontal blade, pulled gently after hearing the click to confirm, then lowered the tilt angle to stay out of the line of sight, and finally placed the phone and checked that the side buttons were not pressed. The whole process required no tools and did not bend the blade.
Post-Installation Checklist and FAQ
After installation, it is advisable to check item by item against the following checklist; these issues are also among the more common after-sales feedback.
| Check Item | What to Check | Common Issue |
|---|---|---|
| Clamping force | Holder does not fall off when pulled gently; phone does not wobble | Clamp too loose, causing it to slide down while driving |
| Blade fit | Clamp fully wraps the blade without crushing it | Blade too thin or too thick, clamp cannot lock |
| Angle adjustment | Ball joint or hinge holds the angle without drooping on its own | Insufficient hinge damping; phone droops when heavy |
| Phone compatibility | Clamp arms do not press side buttons or block the charging port | Insufficient arm travel; large-screen phone not held firmly |
| View obstruction | Holder does not block the view or touch center console buttons | Installed too high or too far inward |
If the clamp slips on the blade, add an anti-slip pad on the inside of the clamp, or switch to a clamp suited to thicker blades. If the hinge droops on its own, check whether hinge damping is sufficient. The factory uses an SK7 shaft, 6,000+ cycle tested, and you can request a hinge feel confirmation at the sample stage. When checking, it is advisable to mount a phone of the target weight in the clamp arms, let it sit for a while and observe whether the angle changes, then open and close it several times to feel whether the damping is even.
For magnetic vent holders, also confirm whether the magnetic force is sufficient. The magnet specification used by the factory is N52 · 4100 GS; holding force depends on phone weight and magnet plate position, so it is advisable to test with common phones in the target market at the sample stage. During testing, attach the phone and shake it gently to see whether it shifts, and confirm the magnet plate is aligned with the center of the phone's back to avoid reduced holding force from off-center placement.
Installation Details to Confirm Before Purchasing
For importers and brands, the installation experience directly affects return rates. Before ordering, it is advisable to confirm the following with the factory:
- The clamp opening dimensions and the matching range for common vent blades in the target market;
- Whether the inside of the clamp has an anti-slip pad and whether the material is heat-resistant;
- Whether hinge damping is adjustable and whether open-close life test data is provided;
- Whether the manual includes illustrated installation steps and supports the target market language;
- Whether spare anti-slip pads or auxiliary tools are included in the packaging.
The factory is located in Dongguan, with a plant area of 3,500 m², in-house injection molding and assembly capabilities, 100+ product types, 21 models already on tooling, and MOQ 50 pcs per model. Samples in 7-10 working days, mass production 7-12 days, 3-5 days for packing and final inspection, FOB Shenzhen. 4 QC staff / 2 lines, 3 production lines, 27 machines, 300,000+ pcs monthly. The factory holds 8 granted patents (CNIPA): 5 design patents + 3 utility models, registered trademark no. 80143576 (Class 9), and copyright registration 国作登字-2024-F-00271084. Third-party testing can be arranged on your behalf for the target market, with costs quoted with the goods.
It is advisable to simulate installation at the sample stage: test the clamp with blades of different thicknesses, test angle retention with phones of different weights, and have a non-professional follow the manual and record any sticking points. This feedback can be used to revise the manual or clamp structure and reduce after-sales issues after mass production. For example, have a colleague who has never used the product install it independently, note where he pauses and whether he mistakenly forces the clamp onto the blade, and then add an illustration or note at the corresponding place in the manual.
Installation Validation from Sample to Mass Production
Installation issues often surface only after mass production, so validation at the sample stage is critical. Buyers are advised to prepare vent blade samples common in the target market, repeatedly install and remove the holder following the standard steps, and observe clamp wear and changes in hinge damping. If the clamp becomes loose or the hinge droops, communicate with the factory promptly to adjust the mold or assembly process. During validation, set a fixed number of installation cycles and record clamping force and angle retention after each set, forming a comparable record sheet that helps determine whether the issue lies in the structure or the assembly.
The factory supports OEM/ODM and can adjust clamp structure, hinge damping and manual content to customer requirements. Before mass production, it is advisable to confirm that the manual version in the packaging matches the target market, to avoid returns caused by unclear installation instructions. Contact us Mon-Sat 9:00-18:00 (GMT+8), reply within one working day.
Need a price for your own model?
Send us your drawing or a reference photo. You will get unit price, sampling time and shipping cost within one working day.
Choosing a vent mount before installation? The vent mount buying guide covers clamp structures and blade fit. For a different in-car format, see the X23 car phone stand; X23 is not an air-vent clip.
Models mentioned in this guide